Master your Internet World Your Ultimate Guide to Setting the TP-Link C60 Router
A lightning internet connection is no less than a superpower in today’s digital era. However, to harness this power, the tool you require is a robust router like the TP-Link C60. In this guide, we will unlock the secrets of setting up your TP-Link Archer C60 router, ensuring you have an online experience.
Introduction
TP-Link Archer C60 setup. This is the best way to setup your TP-Link Archer C60 AC1350 wireless dual band router. We all know the feeling you’ve just bought a router and can’t surf the Internet at lightning, but there’s one obstacle in your way: the setup process. How many times have you found yourself struggling with this wishing there was a simple, step-by-step guide to help you? If you’ve just purchased a TP-Link Archer C60 router or if you just need some help setting up your existing router, you’ve come to the right place!
In this article, we navigate through the process of setting up your TP-Link Archer C60 router, from unpacking the device to securing your network. So, let’s embark on this digital adventure.
Understanding the TP-Link Archer C60 Router
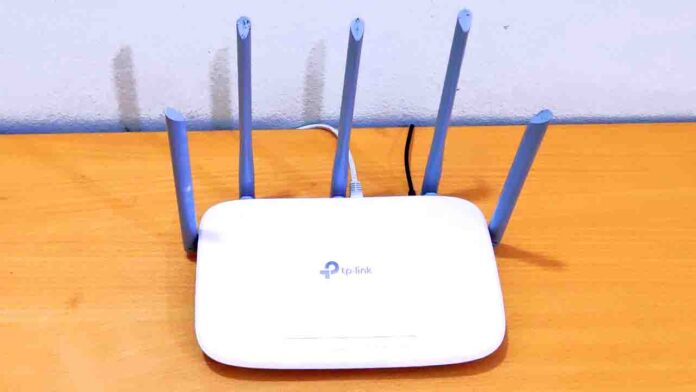
Before we dive into the setup process, let’s take a moment to get acquainted with the device we’re dealing with. The TP-Link Archer C60 is a dual-band wireless router, offering both 2.4GHz and 5GHz bands, ensuring a versatile and seamless internet experience. Equipped with advanced beamforming technology, it can efficiently handle multiple devices simultaneously without compromising the connection quality.
Your Step-By-Step Guide to TP-Link Archer C60 Router Setup
Setting up the Archer C60 is straightforward once you know what steps to follow. Let’s progressively demystify the process.
Easy Unboxing and Identifying Components
- Start by unpacking your TP-Link Archer C60 router.
- Make sure the box includes the Archer C60 router, a power adapter, an Ethernet cable, and a Quick Installation Guide.
Discovering the Router Interface
- Move on to acquaint yourself with the router’s interface.
- At the back of the router, you will find one WAN port (blue), four LAN ports (yellow), the Power On/Off button, and the Reset button.
Connecting the Cables
- Connect the WAN port of your router to your modem using the Ethernet cable provided.
- Plug in the power adapter to the router and the power outlet. Switch on the router and wait for it to initialize.
Setting Up the Router via Web Interface
- Connect your mobile phone or computer to the TP-Link Archer C60 router using an ethernet cable or wi-fi. The network name and password are usually on a sticker, which is on the bottom side of the tp-link archer c60 wi-fi router.
- Once your mobile phone or computer is connected to the TP-Link Archer C60 wifi router. Open a web browser. Type tplinkwifi.net or 192.168.0.1 in the address field, and then press enter to visit the TP-Link Archer C60 router’s web management page.
- To ensure the safety of your network. Please create an administrator or login password to manage your TP-Link Archer C60 router. TP-Link Archer C60 router recommends that your password meets the following conditions. Contains 1 to 32 characters. Alpha characters (a to z). Numbers (0 to 9). Symbols (excluding space). Then, click on let’s get started.
Time Zone Settings
- Selecting your region and time zone.
- Then, click on Next.
Configuring Internet Connection Type
- Select your connection type. If you’re not sure, please click auto-detect. If your internet service provider gives you public IP or static IP address. Select the static IP boxes.
- If your ISP provides PPPoE username and password. Select your connection type PPPoE. Enter your PPPoE username and password given by your internet service provider. First type your PPPoE username. Then, type your PPPoE password.
- Then, click on Next.
Securing Your Network
- Under wireless settings. Confirm or change the wireless network name SSID. Type the wireless network name SSID for your 2.4G band wireless network. Type the password you have chosen in the box next to the password for the 2.4G band. WiFi password must contain at least 8 characters.
- Enter your wifi network name SSID for the 5G band wireless network. Type the password you have chosen in the box next to the password for the 5G band. WiFi password must contain at least 8 characters.
- Then, click on Next.
“Make sure to create a strong password to guard your network from unauthorized access”
Summary Tab
- Under summary tab. Re-check your time zone, internet connection type, wireless network name, and wireless network password.
- Then, click on Save.
Re-Connect the Router
- Finally, you need to reconnect your wireless devices to the new wireless network before clicking the next button.
- To complete the installation process, connect your mobile or computer to the TP-Link Archer C60 Router. Type the wireless network password you have previously set. Once your mobile phone or computer is connected to the TP-Link Archer C60 wifi router.
- Then, click on Next.
Updating the Firmware
Keeping the router’s firmware up-to-date is an essential part of ensuring optimal performance. So, how do you update the firmware?
Firmware Update Path
On the TP-Link interface, navigate to the advanced settings and select the firmware upgrade option. Follow through with the on-screen prompts to complete the upgrade.
And voila! You’ve successfully set up your TP-Link Archer C60 router. You can now connect your devices and surf the net, share files, or stream content from anywhere within your Wi-Fi range.
Quick Recap: Positioning your router correctly, connecting it properly, accessing the router interface, setting up the network, and updating the firmware are the steps to setting up your TP-Link Archer C60.
Congrats, your router is all set up and running like clockwork! As you enjoy your high-speed connection, let’s stay connected! Check back for more tips and guides. If you found this helpful, share it; you might just make someone’s day!

